Release 3.3 Copyright ©1994 by NeXT Computer, Inc.  All Rights Reserved.


4 Setting Up the Network File System
The Network File System (NFS) allows files stored on one computer to be accessed from other computers as though the files were on a local disk. This makes it possible for users to access the same files from any computer on a network.
The computer that shares the files on its local disk--the NFS or file server--must make the files available to other computers. Once the files are made available, an NFS client mounts or imports them, in very much the same way it would mount any other file system.
Note:  It's critical that network time service be configured for all computers that provide or share remote directories. See Chapter 3, "NetInfo Networking," for details.


Exporting File Systems to the Network

To make a directory available to other computers on the network, a file server must export that directory. Information about exported directories is stored in the NetInfo database. The exportfs command, run automatically during system startup, uses the information in NetInfo to export directories.


Planning Shared Files

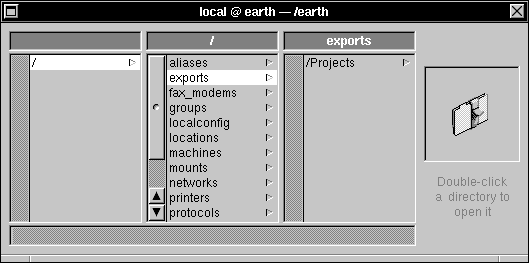
Before you export any directories, it's a good idea to plan which directories you will make available, and what kinds of access you will allow.


Directories

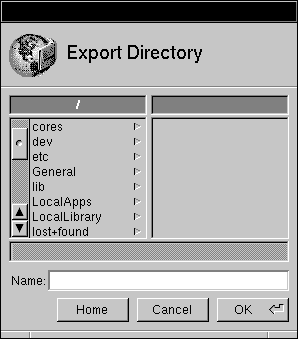
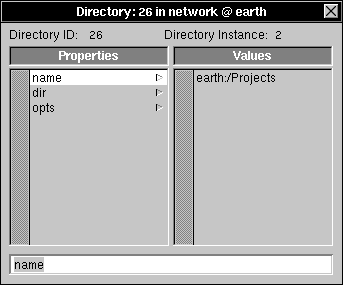
You can only export directories from a local disk. In other words, you can't re-export a directory that has been remotely mounted from another computer. You specify the directory to be exported by a pathname, rather than a device name. The exported directory, including all of its subdirectories, is made available to the network. You can't export both a directory and any of its children if they're on the same device. For example, if you export a directory named /Shared/Projects, you can't also export the directory /Shared, unless /Shared/Projects is mounted locally from a separate disk or partition. However, exporting /Shared makes /Shared/Projects available, since the entire directory tree is exported.


Access

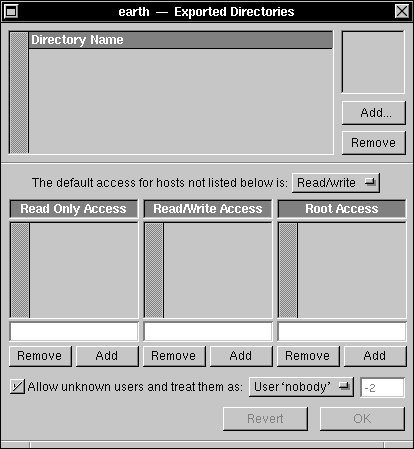
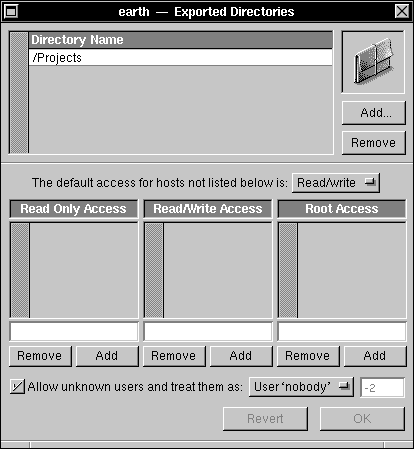
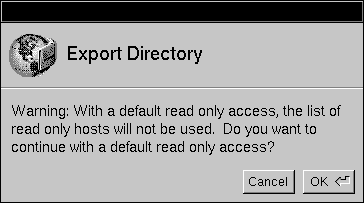
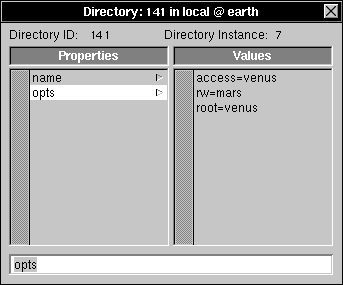
When you export a directory, you specify which hosts are allowed to mount that directory. You can allow all computers to mount the directory, or you can restrict access to a list of specific host names. You can further restrict access by specifying whether hosts will be allowed only to read the remote directory, or also to write to the directory (subject to the normal restrictions of file and directory permissions).


Access as root

For security reasons, a user logged in as root usually isn't allowed to access remotely mounted files or directories with root privileges. However, you can grant root access to a list of hosts. If a user is logged in as root on one of the specified hosts, the user will be granted root access to the exported directory.

Note:  If you want to add users from a computer other than the home directory server, you need to grant root access for the home directory to the hosts you will be adding users from. See Chapter 5, "Managing User Accounts and User Groups," for information about adding users.


Unknown Users

You can decide if you want unknown users to be allowed access to the exported directory. If a user is logged into a host that has access to the remote directory, but is logged in with a user account that isn't recognized on the file server, the user is treated as an unknown or anonymous user. Normally, an anonymous user is treated as if it were the special user nobody, which has a user ID of 2. The user nobody has very limited access to files; the file and directory permissions for other apply to nobody.

A user logged in as root is always treated as an unknown user, unless the user is logged into a host that has been granted root access. If you allow access to anonymous users, you can have them treated as nobody, or as some other user. See the User's Guide for information about file permissions, and Chapter 5 for more information about user IDs.


Setting Up an NFS Server

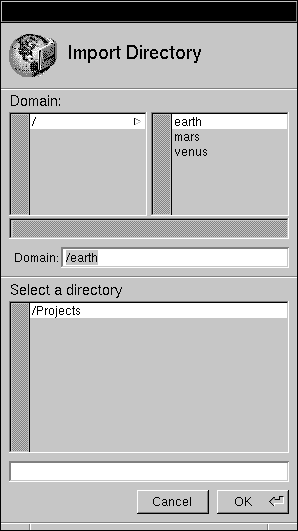
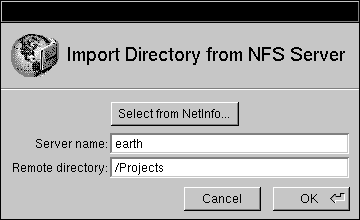
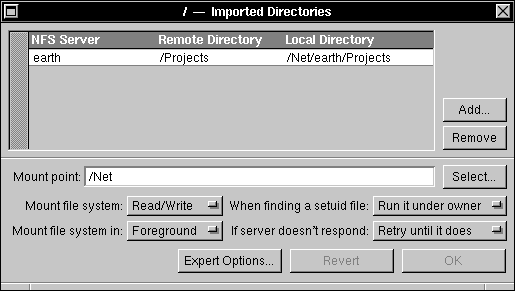
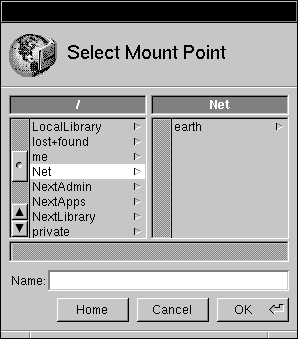
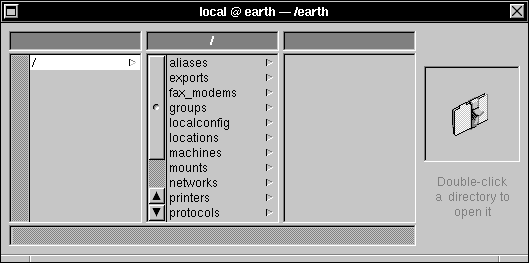
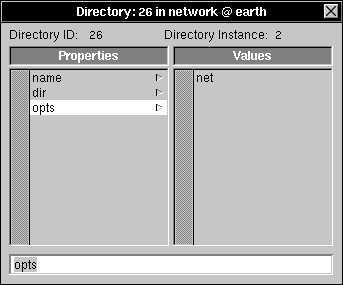
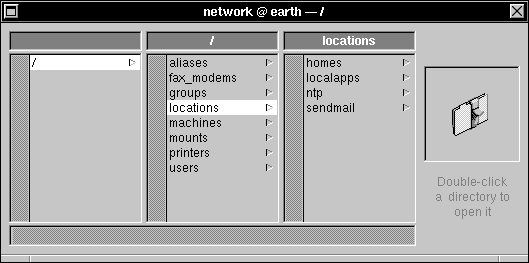
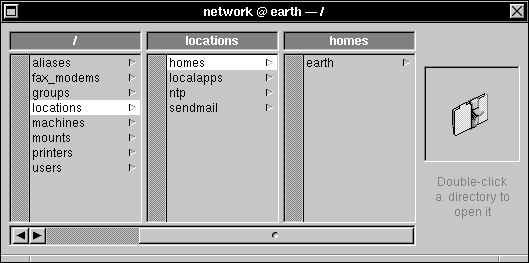
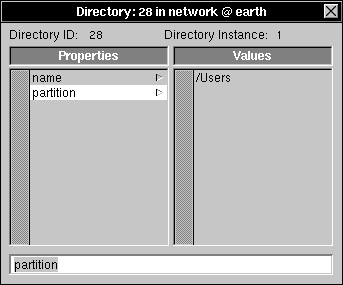
To configure an NFS server, you need to instruct the server to export the part of the disk that you want to share. To do this, you use the NFSManager application:

1. Log into the computer that will be the file server, using any valid account.
2. Start up NFSManager, located in /NextAdmin. Both the Imported Directories and Exported Directories windows for the local domain appear.
3. Click in the Exported Directories window to make it key.


4. Click the Add button in the upper right of the Exported Directories window to add the directory to be exported. The Export Directory panel appears.


5. Use the browser to select the directory, then click OK. A panel appears asking for the root password for the local domain.


6. Enter the root password and click Login. The exported directory appears in the list.


Note:  If you prefer, you can add a directory simply by selecting it in the Workspace Manager File Viewer, then dragging the icon into the well in the Exported Directories window.

7. If you want a specific group of hosts to have read-only access to the exported directory, click in the text field below the Read Only Access column. Enter a host name, then click the Add button below the text field. Repeat for any other hosts you want to have read-only access.
8. If you want to have a specific group of hosts have read/write access to the exported directory, click in the text field below the Read/Write Access column. Enter a host name, then click the Add button below the text field. Repeat for any other hosts you want to have read/write access. Note that you can't have the same host name listed in both the Read/Write Access and Read Only Access columns.
Note:  You can use a netgroup name in place of a host name in either list. See Chapter 3, "NetInfo Networking," for more information about netgroups.
9. Set the default access for hosts not listed in either column by pressing the default access button and dragging to the desired setting. This setting determines the access that will be granted to any hosts on the network that aren't listed in the Read Only Access or Read/Write Access columns. Note the following restrictions on the default access:

If you have any host names listed in the Read Only Access column, default access can only be set to None.
If you have host names listed in the Read/Write Access column, but none in the Read Only Access column, default access can be set to either Read Only or None.
If you have no host names listed in either column, default access can be set to Read/Write, Read Only, or None. If you choose None in this situation, you'll have an exported directory that can't be accessed--not a very useful choice.

10. If you want root access to be permitted for any hosts, use the Root Access column. Click in the text field below the column, enter the host name, and click Add. Repeat for any other hosts.
11. If you don't want unknown users to have access to the exported directory, click the switch labeled "Allow unknown users..." to uncheck it.
12. If you're allowing unknown users to have access to the exported directory, but want to treat them as some user other than nobody, press the unknown user button and select "user with uid" from the pop-up list. Then, enter the desired user ID (not user name) in the text field. See Chapter 5 for more information about user IDs.

Warning: Treating unknown users as root (user ID 0) is a serious security risk. Although doing so allows root access from any host, it also grants root privileges to any unknown user.
13. Click OK. If you've chosen a default access that conflicts with your other access choices, a panel appears telling you how your choices will be modified. Click OK to accept the modifications.


Your directory is now exported and available to other hosts on the network, according to the access controls you specified.

Note:  If you encounter an error message during configuration, see the "Troubleshooting" section at the end of this chapter.


Importing Network File Systems

In order for an NFS client to access an exported directory tree, it must mount the directory. Mount information for remote directories is stored in the NetInfo database. If you used SimpleNetworkStarter to set up a file server, such as a home directory server or general purpose server, the mount information was automatically put in the root NetInfo domain.


Planning Mount Options

Before you begin importing remote directories, it's a good idea to plan how and where they will be mounted.


NetInfo Domain

If you would like every computer on the network to mount a particular NFS directory, enter the mount information into the root NetInfo domain. Even computers you later add to the network will automatically use this mount information.

If you would like only a subset of the network to mount the directory tree, enter the mount information into the local NetInfo domain of each NFS client individually. Or, if you have a NetInfo domain hierarchy with more than two levels, you might want to put the mount information in midlevel domains.


Mount Point

When a computer imports a remote directory, a connection is made between a directory on the local computer and the remote file system. Once the connection is made (the file system is mounted), the remote directories can be accessed through the local directory, called the mount point. For example, if there is an application server exporting the directory /LocalApps, you would mount it on the local directory /LocalApps (in this case, the remote directory and the mount point have the same name, but that's not required). Everything appearing under /LocalApps on the local computer is actually on the hard disk connected to the file server.


Automatic Mount

Usually, remote directories are mounted at boot time, and the files in the NFS directory are always available. However, you can choose to mount a remote file system so that the actual connection isn't made until a user attempts to access the remote directory. Directories mounted in this way show up in the local directory hierarchy as /Net/hostname/directory, where hostname is the host name of the file server, and directory is the name of the exported directory.

For example, if you have a computer named hserv that is exporting the directory /Users for home directories, the client computers might mount the directory as /Net/hserv/Users. Automatically mounted directories have two advantages: it's very obvious that the directory is an NFS directory, because the name of the file server appears in the pathname, and unnecessary overhead is reduced because the mount isn't performed unless the files are actually needed.


Foreground or Background

When a computer boots, it attempts to mount all the remote directories except those designated automatic mounts. If a file server doesn't respond (perhaps it isn't turned on), the computer waits until it receives a response before continuing. This means that the boot process won't complete until all the file servers have responded. However, if you mount a remote directory in the background, the computer will continue to boot without a response from the file server, then keep trying to mount the remote file system in the background. Remote file systems that aren't critical for regular operations should be mounted in the background, while file systems that are absolutely necessary (such as home directories or the mail spool directory) should be mounted in the foreground.


Interruptible Mount

Sometimes, a file server becomes unavailable after a remote directory has been mounted. Perhaps it's been turned off, or the network traffic is so heavy that it can't respond quickly enough. This becomes a problem when a user attempts to access a remote directory from the server. You can handle such an occurrence in three ways: return an error message if the server doesn't respond, keep retrying until the server responds, or keep retrying until the server responds or the user interrupts the process (if the file access is attempted from a shell window, pressing Control-c will interrupt the process).


Setuid Files

Sometimes, a program or application needs to run as if it had been executed by someone other than the user that started it. For example, the PrintManager application acts as root so that users can add new printers or remove print jobs from the print queue. A file containing such a program is called a setuid file because executing the contents of the file sets the user ID. A setuid file will be run as if it had been executed by the owner of the file. On a shared directory, you may want to ignore the setuid feature and have such files run as the regular user to prevent possible security problems.


Importing a Remote Directory

To import a directory that has previously been exported, do the following:

1. Log into any computer on the network, using any valid account.
2. Start up NFSManager, located in /NextAdmin. Both the Imported Directories and Exported Directories windows for the local domain appear.
3. Choose Import To from the main menu. The Select NetInfo Domain panel appears.


4. Click / in the left column to select the root domain (if you have more than two domain levels, select the appropriate domain). Click OK. A new Imported Directories window appears. Note that the domain is listed in the title bar.


5. Click Add. The Import Directory from NFS Server panel appears.


6. Click Select from Netinfo. The Import Directory panel appears.


7. In the top half of this panel, click the host name of the file server. In the bottom half of the panel, click the name of the exported directory. Click OK. You're returned to the Import Directory from NFS Server panel, with the "Server name" and "Remote directory" fields complete.


Note:  If you prefer, you can enter the host name and directory name directly into the text fields.

8. Click OK. The mount information is displayed in the Imported Directories window.


9. If you want to specify a mount point other than /Net, enter the full pathname of the mount point in the "Mount point" text field. Remember that the /Net mount point indicates an automatic mount. If you prefer, you can click Select and use the Select Mount Point panel to modify the mount point.


10. If you want to use mount options other than the defaults, set the fields as follows:

a. If you want the hosts to mount the directory read-only, press the "Mount the file system" button and drag to Read Only.
b. If you want the directory to be mounted in the background, press the "Mount file system in" button and drag to Background.
c. Press the button labeled "If server doesn't respond" and drag to the desired setting. The three settings correspond to the possibilities discussed in "Planning Mount Options" earlier in this chapter.
d. If you want setuid files to be run as the regular user, press the button labeled "When finding a setuid file," and drag to "Ignore setuid bit."
e. The Expert Options button opens a panel with additional options. In general, you can leave them at their default settings. For more details about these options, see the UNIX manual page for mount.

11. Click OK.

The remote directory can now be mounted on the client computers. If the directory is mounted under /Net, it will be mounted automatically. If it's mounted somewhere else, it will be mounted the next time the client computers are booted.


Examining the NetInfo Database

NFSManager stores information about exported and imported directories in the NetInfo database.


Export Information

First, look at the NetInfo information about exported directories:

1. Start up NetInfoManager, located in /NextAdmin.
2. Choose Open from the Domain menu. The Select NetInfo Domain panel appears.


3. Click the host name of the file server in the right column to select the local domain for that host. Click OK. A domain window appears. If you're logged into the file server, a domain window for the local domain may already be on the screen.


4. Click exports in the middle column. The subdirectories listed represent all the directories exported from this host.


5. Select one of the exported directories by clicking it. Then, open the Directory window by double-clicking the name.


6. Click opts in the Properties column, if it exists. The values associated with this property are the nondefault access options you specified with NFSManager.


Some of the options you might see are:

rw=host1:host2 Specifies that the listed hosts are granted read/write access, while all other hosts have read-only access.
root=host1:host2 Specifies that the listed hosts can access the exported directory as root.
nosuid Specifies that setuid files will be executed as the regular user.
anon=uid Specifies that unknown users will be treated as the user identified by uid.

For more information, see the UNIX manual page for exportfs.

7. Close the Directory window.


Mount Information

Now examine the mount information stored in the root domain:

1. Start up the NetInfoManager application, located in /NextAdmin.
2. Choose Open from the Domain menu. The Select NetInfo Domain panel appears.


3. Click / in the left column to select the root domain. If you put the mount information in some domain other than root, click its name in the panel. Click OK. A domain window appears.
4. Click mounts in the middle column. The subdirectories listed represent all the mount information stored in this domain.


Note that the name of each directory is in the form host:directory, where host is the name of the remote file server, and directory is the name of the exported directory.

5. Select one of the mount directories by clicking it. Then, open the Directory window by double-clicking the name.


6. Click dir in the Properties column. The value of this property is the pathname of the mount point on the local computer.


7. Click opts in the Properties column. The values of this property indicate the options that describe how the remote directory will be mounted.


Some of the values you might see for the opts property are:

rw Specifies that client computers can read from, and write to, the directory. Normal file and directory permissions apply.
bg Specifies that if the first mount attempt fails, the mount should be retried in the background, allowing the system to continue booting.
intr Specifies that an attempt to access the remote directory from a shell window can be interrupted.
net Specifies that the remote directory will be automatically mounted. See "Planning Mount Options" earlier in this chapter for information about automatic NFS mounts.

For a complete list of available options, see the UNIX manual page for mount.

8. Close the directory window.


The /locations Directory

Information about home directory servers, application servers, and the mail server is kept in the /locations directory of the root domain. Follow these steps to examine the /locations directory:

1. Use NetInfoManager to open the root domain.
2. Click locations in the center column. The subdirectories store information about the location of various system components.


3. Click homes in the right column if it exists. This directory lists the file servers that have been designated home directory servers with SimpleNetworkStarter. Any hosts listed here will appear in the home directory pop-up list in UserManager.


4. Click one of the subdirectories, then double-click it to open the Directory window.


The properties of this directory include the host name of the file server and the name of the exported directory.

5. Close the Directory window, then click /locations/localapps if it exists. Double-click the directory to open a Directory window.


If a host has been configured as an application server with SimpleNetworkStarter, its name will appear as the value of the hostname property. This prevents additional hosts from being configured as application servers by SimpleNetworkStarter.


Troubleshooting

When you boot an NFS server, or when you export a directory with NFSManager, you may see an error message similar to either of the following:

exportfs: /directory: parent-directory (/) already exported

exportfs: /: sub-directory (/directory) already exported

These messages result from the fact that you can't export a directory that's either a parent or a subdirectory of one that's already exported if both directories reside on the same device. For example, if you attempt to export both /Users and /Users/elmo, you see an error message.

To avoid this type of error, export the parent directory only. In the example, this means only exporting /Users. This avoids the error condition and still makes /Users/elmo available.

If you need to change the directories that are currently being exported, use NFSManager to make the modifications.